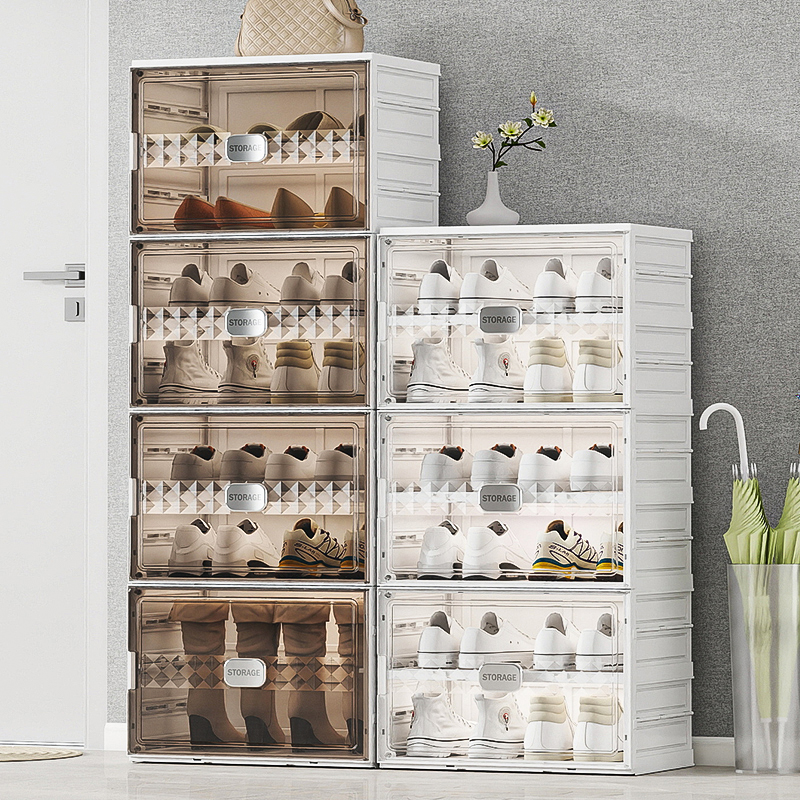
Understanding the Storage Cabinet Structure and Components
Main Parts of a Plastic Storage Cabinet
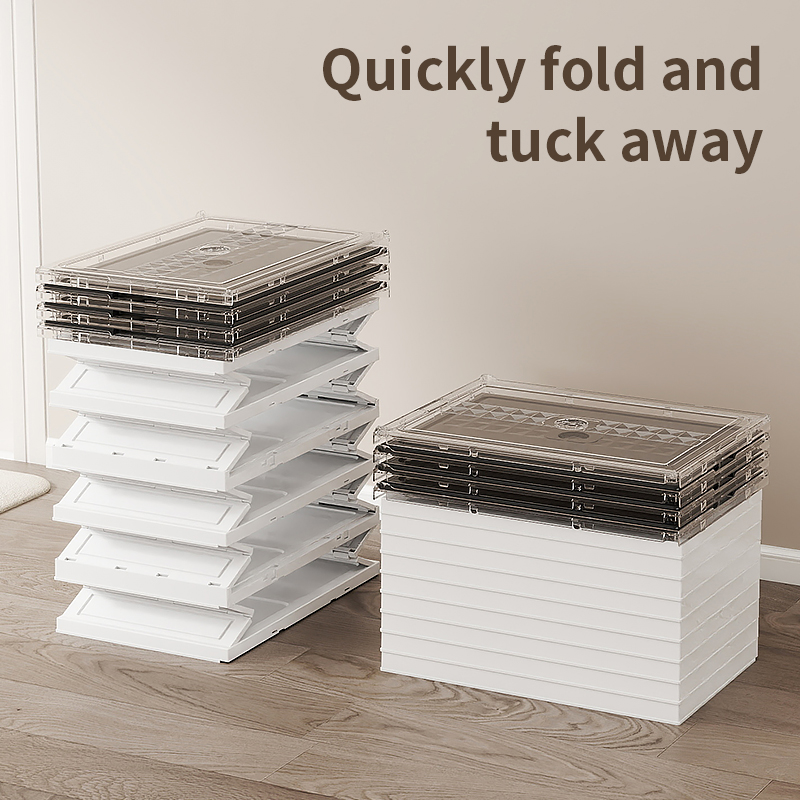
A typical plastic storage cabinet comprises five core elements: a reinforced base frame, interlocking side panels, adjustable shelves, a stabilizing back panel, and hinged doors. Modular designs often feature snap-fit connectors instead of traditional screws, with 78% of models incorporating UV-resistant polypropylene for indoor/outdoor durability. Key components include:
- Base units with load-bearing ridges (supports 150—300 lbs depending on wall thickness)
- Panel interlock systems using tongue-and-groove joints
- Stackable roof caps for multi-cabinet configurations
Identifying Joints, Panels, and Fasteners
Modern cabinets utilize three primary connection types: press-fit plastic dowels (common in lightweight models), T-slot aluminum rails (for heavy-duty units), and hybrid systems combining both. Critical identifiers:
- Panel edges with arrow markings indicating assembly direction
- Pre-molded slots for shelf pins at 1" intervals
- Color-coded fasteners (red for structural joints, blue for decorative elements)
Common Design Variations in Storage Cabinet Models
Recent innovations include fold-flat designs reducing packaging volume by 40% and dual-material constructions pairing ABS plastic frames with polycarbonate doors. A 2024 Cabinet Efficiency Study found cabinets with vertical ribbing in side panels demonstrate 31% greater lateral stability than smooth-walled models. Manufacturers now prioritize:
- Modularity: 85% of new cabinets support horizontal/vertical expansions
- Tool-free assembly: 62% of consumer-focused models eliminate screwdrivers
- Environmental resistance: 70% of outdoor-rated units include integrated moisture seals
Preparing for Assembly: Workspace and Component Check
Lay Out All Pieces and Verify Completeness Using the Manual
First thing's first, get everything out of the box onto a space where there's plenty of room to move around. Most makers suggest putting together those plastic storage units on something level so they don't wobble when done. Check off every part against what's listed in the instructions booklet. Did you know? Studies found that almost two thirds of folks run into problems during assembly because some pieces just aren't there anymore. Sort through all those bits and bobs too - separate the big panels from smaller hardware like screws and brackets. Maybe even color code them if possible. Makes finding what needs to go where so much easier later on.
Choose the Right Workspace for Efficient Assembly
Adequate workspace design impacts build speed and safety. Prioritize:
- Space: Allow 3—4 feet of clearance around your work area for maneuvering large panels
- Lighting: Use task lighting to distinguish color-coded connectors
- Surface: Lay cardboard or foam boards to protect plastic finishes during assembly
Tools Needed (if Any) for a Smooth Build Process
While many plastic cabinets use snap-together designs, keep these essentials nearby:
| Tool Type | Purpose | Frequency of Use |
|---|---|---|
| Rubber mallet | Seamless panel joining | Moderate |
| Phillips screwdriver | Tightening cam locks | High |
| Level | Verifying cabinet alignment | Critical |
Avoid power tools unless specified—over-tightening screws accounts for 41% of plastic cabinet cracks (DIY Repair Institute 2023). Store small fasteners in magnetic trays to prevent loss.
Step-by-Step Assembly Guide for Fast and Secure Installation
Connecting Base and Side Panels Securely
Start by aligning the base panel's pre-molded tabs with corresponding slots in the side panels. For interlocking joints, push downward until you hear a firm click — this confirms the self-locking mechanism has engaged. Use included nylon screws at corners for cabinets supporting over 75 lbs (34 kg) to prevent lateral shifting.
Installing Shelves With Proper Alignment
Most plastic storage cabinets feature alignment notches on side panels. Position shelves so their rear edges sit ½— forward from the back panel groove, creating space for the upcoming backplate installation. For adjustable models, test shelf stability by applying 15-20 lbs (6.8-9 kg) of downward pressure before loading.
Attaching Back Panel and Reinforcing Stability
The back panel acts as a structural brace. Insert it diagonally to prevent flexing, then secure all factory-punched holes with provided fasteners. On units taller than 60— (152 cm), add diagonal tension straps using the extra mounting points near the top and base.
Finalizing Door and Handle Installation
Align door hinges with the pre-drilled upper and lower pivot sockets. Rotate the door through its full 180° arc before tightening screws to verify smooth operation. For magnetic catches, position them …— (3 mm) past the cabinet frame’s edge to ensure positive closure.
Time-Saving Techniques Used by Experienced Assemblers
- Pre-sort parts using the manual’s exploded diagram codes (usually marked like "A3" or "C7")
- Use a rubber mallet for stubborn joints — strike through a protective cloth to prevent marks
- Complete assembly in this sequence: base ‘ sides ‘ shelves ‘ back ‘ doors ‘ handles
Workbench studies show proper sequence adherence reduces assembly time by 40% compared to random approaches.
Troubleshooting Common Storage Cabinet Assembly Issues
Fixing misaligned holes or warped panels
First things first, make sure whatever surface you're working on is actually flat. Most folks don't realize it, but crooked surfaces cause about 4 out of every 10 alignment issues when putting together modular furniture. When those pesky screw holes just won't line up, try rotating the panels slightly until they click into place naturally. If that doesn't work, a small 1/8 inch drill bit usually does the trick for making tiny adjustments. Shelves that look bent tend to straighten themselves out once sandwiched between the side panels, though placing something heavy like a couple books on them temporarily speeds up the process quite a bit. And remember not to crank down those screws too tight either. Plastic components get all kinds of messed up when subjected to too much force, so go easy and let everything settle in properly.
Dealing with missing or damaged parts
Immediately cross-check components against the manual's exploded diagram. If critical parts like shelf pins or cam locks are missing, contact the manufacturer—most resolve parts requests within 72 hours. For temporary repairs:
- Replace broken shelf edges with L-shaped aluminum brackets
- Use nylon washers as spacers for stripped screw holes
- Substitute missing drawer slides with 1/4" plywood guides
Never force ill-fitting components—plastic cabinets require precise alignment to maintain weight capacity ratings (up to 50 lbs/shelf for most models).
Ensuring Long-Term Durability and Stability of Your Storage Cabinet
Reinforcement Tips for Long-Term Use
Strengthen your plastic storage cabinet’s structure by adding corner braces at joints vulnerable to stress. Manufacturers recommend reinforcing shelf brackets with heavy-duty screws if storing items over 15 lbs. Conduct bi-annual hardware checks to tighten loose screws and replace warped shelf pegs before they compromise stability.
Weight Distribution Best Practices
Avoid uneven loading by placing heavier items on lower shelves. A 2023 furniture durability study found shelves loaded beyond 70% capacity develop stress fractures 3x faster. Use modular organizers to spread weight horizontally, and never exceed your cabinet’s rated capacity, typically 50—75 lbs per shelf for standard models.
Environmental Factors Affecting Plastic Cabinet Integrity
Sunlight and humidity account for 68% of premature plastic degradation (Polymer Materials Institute 2022). Position cabinets away from windows to minimize UV exposure, and maintain room humidity below 55% to prevent warping. In damp areas like garages, apply silicone sealant to panel seams and use moisture-absorbing packets inside compartments.
FAQ
-
What are the main parts of a plastic storage cabinet?
A typical plastic storage cabinet includes a base frame, side panels, shelves, a back panel, and hinged doors.
-
How do I prepare for assembling a plastic storage cabinet?
Ensure adequate space, verify all parts using the manual, and arrange them before starting the assembly.
-
What if parts are missing during assembly?
Contact the manufacturer for replacements. Temporary solutions involve using alternative items like L-shaped brackets.
-
How can I enhance the durability of my storage cabinet?
Reinforce joints with corner braces and heavy-duty screws, and conduct regular maintenance checks.
Table of Contents
- Understanding the Storage Cabinet Structure and Components
- Preparing for Assembly: Workspace and Component Check
- Step-by-Step Assembly Guide for Fast and Secure Installation
- Troubleshooting Common Storage Cabinet Assembly Issues
- Ensuring Long-Term Durability and Stability of Your Storage Cabinet
- FAQ